Enable
Tickets are per-org and default to off so an unconfigured org doesn't accumulate noise.
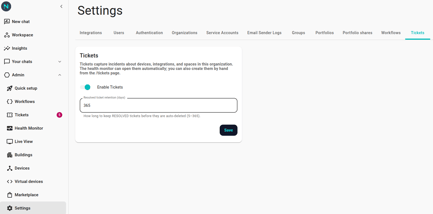
- Open Settings → Tickets.
- Toggle Enable tickets on.
- Save.
The Tickets page becomes available immediately and starts accepting tickets from any source: health monitor, workflow actions, manual user reports.
What's actually on this page
Today, two fields:
- Enable tickets — the master switch. Off means existing tickets remain readable but no new tickets land and no auto-resolves happen.
- Resolved-ticket retention (days) — how long resolved tickets are kept before they're auto-deleted. Range 5–365, default 365. Open and started tickets are never retention-deleted.
The rest of the per-org policy that affects ticket creation (debounce windows, flap threshold, reopen window) lives on the health-monitor side — see Health monitor policy settings.
Verify it's wired up
- Tickets page reachable. The page loads with the educational hero or a list.
- A test ticket lands. With the health monitor enabled and a test device unplugged, a
Ticket Openedrow should appear within a minute (open-debounce default 60s). - Workflow actions can file. Build a one-shot workflow with an
Open Ticketaction and run it manually. A ticket appears withsource: "Workflow".