What a service account is
A service account is a non-human identity inside your organization. It has admin-level API access, no interactive login, and is scoped to the organization it was created in. The workflow engine runs scheduled triggers "as" this identity so every execution has a stable, non-personal owner — even when people join, leave, or change roles.
Create a service account
- Go to Admin → Settings → Service Accounts.
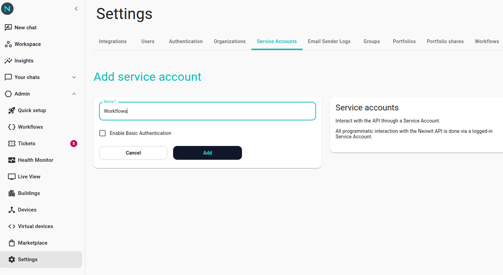
- Click Add.
- Enter a Name. Pick something obvious like Workflows so future admins can tell at a glance what it's for.
- Leave Enable Basic Authentication off. That option is for external systems that need HTTP Basic Auth against this account — the workflow engine doesn't.
- Click Save. You're taken to the account's edit page and see a "Service account successfully added!" toast.
Use it with the workflow engine
- Go to Admin → Settings → Workflows.
- Open the Execution Service Account dropdown — your new account is in the list by name.
- Pick it and click Save.
For the full walkthrough of the Workflow Engine settings page, see Enable workflows for your org.
Account keys (optional)
You don't need a key for the workflow engine. The engine identifies the account by its internal ID, not a key or secret. Keys are only for external callers — scripts, CI pipelines, or anything outside Neowit that needs to authenticate as this account against the API.
Keep the account in place
- Don't delete the service account selected on the Workflow Engine page. Scheduled triggers fail immediately with execution errors if the engine's configured account no longer resolves.
- Renaming is safe — the account's internal ID doesn't change — but it makes logs harder to read if the name no longer matches what scheduled executions show up as.
Replacing the service account
Rotate when credentials are compromised, when there's an organizational change, or as routine cleanup.
- Create a new service account using the steps above.
- Go to Admin → Settings → Workflows and switch the Execution Service Account dropdown to the new one. Click Save.
- Once nothing else references it, delete the old service account from Admin → Settings → Service Accounts.
Do the switch before the delete — otherwise scheduled executions error out in the window between.