Using Insights will help you understand your workspace, by giving you valuable information about usage and capacity and supporting you in decision making.
For you to to create meaningful reports, you need to know what type of space you want to analyze.
Let get started with your first insights report!
Step 1: Create report
1. Navigate to the Insights icon
2. Click + and give your insight report a name and click create

Now you have created your first insight report, next step is to fill it with panels for you to visualise the data you want to present.
3. Click on the same plus button again, inside the report you just created

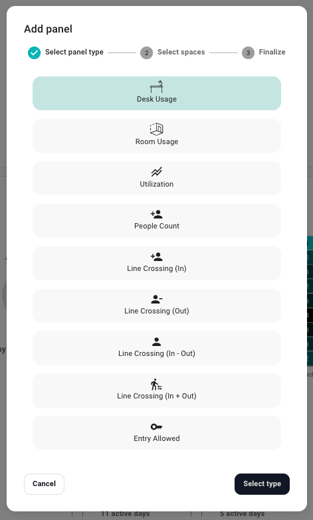
To Add a panel, select panel type:
Step 2: Select spaces

By marking out areas in the floor plan when creating the building,
will make it easier to select areas that consist of the same type of space.
Step 3: Finalize and sharing
- After selecting spaces, look over the floor plan and make sure that you have selected the correct spaces before finalizing.

Report Sharing Guidelines
Now that you have made an insights report with panels, you can eit
her export it as a CSV file or share it by editing the report.
To do so:
CSV file
 Click the three dots on the panel you want to Export
(If its a large file it will take sometime to download)
Sharing

- Click on the report you want to share
- Click the icons and edit
- Now choose if it is going to be:
- Private- Only you can see or edit
- Read only- Admin can see but not edit
- Public-Admin can see and edit
- Click save
You can also share with other, by adding users.
They have to be a member of the organization to see the insights.