.jpg?width=688&height=387&name=How%20to%20get%20started%20Pictures%20(7).jpg)
What do you need before you start:
- Picture of the building in format: PNG, JPG
- Floor plan in format: PNG, JPEG, JPG
- Names of spaces (rooms/area/desks)
Video guide
3 min
Text guide
When you (admin) logs in to the platform, the first thing you will see is this page.

Adding a building
To add a building you need to click the menu on the top right and choose add building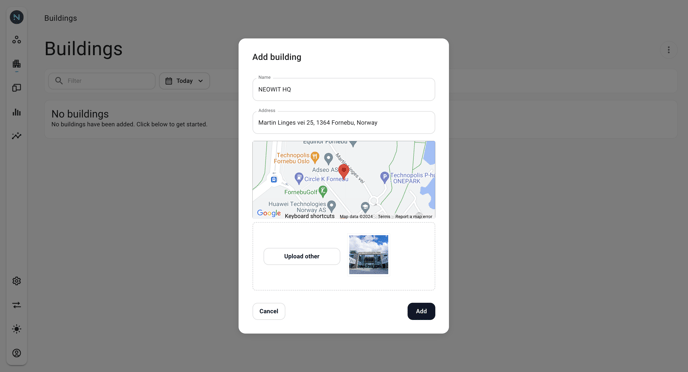
- Enter the name of the building/Office space
- Enter the address of the location
- Upload building image
- Click add
If you get this massage, change the picture format and try again.

Editing Building panel
If you want to change picture or edit address or name, click the meny in the tile you want to make changes to and choose to edit.
Adding a floor
Now that you have created a building, you need to add spaces
- To add a floor, click the building tile you just created.
- Then, click the menu on the top right to add floor.
- Type in the name of the floor, it's capacity and upload an image of the floorplan and click next.
- Mark out the complete area that you want to add areas and rooms to and click save.


Adding Spaces
For the platform to understand where the device is, we need to mark out all areas that consist of spaces as rooms and desk. To make a desk you first have to mark out a area/room inside the floorplan
Remember you are making a hiriaki/parent- to child so start out with rooms and areas and work your way to desks.

SSOT:Give your device the same name as your desk, room, area...
How do you add a room
Click the menu on the top right and choose add area

How do you add a desk
Enter the area you want to add desks and click the menu on the top right and choose add area. Now you have the possibility to choose window, door and desk.
Give your desk a name , enter capacity and choose desk before clicking next.
Mark out the area for the desk inside the area its placed.

Next step is to add integration and place out devices in floor plan.
If you do not have any need for integration at the moment, create profile and create a workspace